Solar Panels
- Van Journey

- May 29, 2019
- 4 min read
Updated: May 31, 2024
These are 100% one of our absolute best buys for our van.... not only do they give us total freedom, our carbon footprint has been seriously reduced even more...WINNER!

We have not needed any electric hookup, at all since we fitted our solar power system.... this was at the beginning of May 2018 - we run nearly everything except our cooker, fridge/freezer and heating off of harnessed solar power, plus keep the engine battery nicely topped up for when we stay put for any length of time - we find this pretty amazing!
Anyone thinking of getting solar power, we would 100% go for it!..... to share with you what our setup is and how we fitted it, we are going to start right at the beginning.....
First thing was we needed to spec up the size of the system we needed, based upon our electrical demands within our van. We have 1 x 110Ah leisure battery.
We swapped out all of our lights for LED's previously. This gives a lighting demand of 26w, if they were on all the time. We spec'd up for half the lights to be on for maximum 6hrs per day, this equates to 78w per day - divide that by our 12v supply, that's 6.5A from the battery per 24hrs.
Next up is the water pump, ours is 54w, we spec'd for this to run max 2hrs per 24hr period, that's 108w per day or 9A from the battery.
Cooling fans, we have 3 and allowed 173w as we spec'd for them to run 24hrs a day in the heat, esp with kids and animals. (14.4A)
Heating system fan is 15.6w which we allowed up to 6 hrs per day 7.8A.
The TV, we have never been big TV watchers but allowed a couple of hrs per day for a film etc if required, thats 60w per day.
So for all our appliance demand, it was 513w per day or 43A from the battery per day. We allowed an additional 200w per day for phones, laptop's, camera chargers and everything else we may miss or pick up on route - so total 713w or 59.4A per day.
Once we had got our demand, we needed to choose our panels - (tip: something to bear in mind if you plan to full time, during the winter months the daylight hrs are shorter and solar panels only work in the day) we spec'd our system to easily recharge the 59.4A usage every 24hrs, within 7hrs per day of usable daylight for solar. We knew we needed at least 120w of solar capacity on our roof to keep us electrically self sufficient.
Flexible or fixed panels?..... really personal choice.... we opted for fixed. The guarantee on flexible panels is less than on fixed panels, the lifespan is notably shorter also. With the shape of our roof it would have been easier to fix flexible panels as they do not need a flat surface....... we were thinking long term and also liked the idea of keeping a good air flow under them. Whichever panels you choose they need to be stuck to the roof well enough to sustain traveling speed plus any head wind - potentially the equivalent of 100mph plus winds.
Roof space..... skylights, aerials need to be worked around - measuring the usable space we have on our roof to mount the panels, we were looking at the flat roof areas available between these obstacles.
We know the panel wattage we need for the demand and the space we have to fit them up top...... we then spoke to Midsummer Energy (there gear is also available here) - these guys were great and confirmed the calculations we had done were correct, they also helped with selection of panels for the sizes we needed to fit our roof space.
We opted for 2x 110w compact, an mppt charge controller as they are more efficient and the remote monitoring panel so we can keep an eye on the performance of the system, at a push of a button from the comfort of the van. We wanted to mount our charger as close to the batteries as we could which meant we bought our solar panels with 7m leads and these are all good to be open to natures elements.
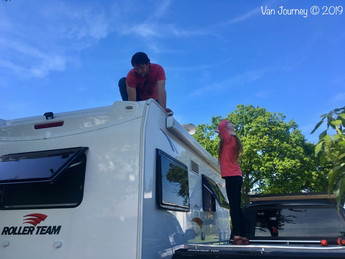
Mounting the panels:
We used good ol’ Sikaflex 512 to stick the panel mounting feet to the roof of the van, once dry 24hrs, we mounted the panels in the feet and bolted them in position. Then we mounted the charge controller near the batteries and wired it in, we also fitted a split charger to allow the solar panels to charge the vehicle battery also, this ensures the alarm system never drains the battery on the vehicle.
Now the bit everybody dreads i'm sure............. drilling a hole through the roof of your lovely, currently waterproof van roof, well its not that bad.... 10mm hole fits both the positive and negative panel wires through and with the gland box we bought from Midsummer Energy, it was really easy to ensure a good water tight seal with the Sikaflex. We drilled through into the cable duct behind the high level cupboards in the van and run the cables through where the existing vehicle wiring is, as we did not want additional visible wiring.
Once the solar panels were connected up, we measured the charging voltage to the batteries, result - we have power!


Finally we chose where we wanted the remote monitoring panel - our best spot was right next to our vans control system. After fitting the panel and running the data cable down from the panel to the controller, we now have the facility to see how many Amps we are charging to the battery and also the current voltage level of the battery.

The panels need a bit of a clean up every now and again - they really don’t need to be spotless at all to keep bringing that energy in.... we have not needed hookup since 2017, which we are so proud of - 100% worth getting your rig decked out with this bit of kit!
Feel free to hit us up with any questions!
all the best - Martin & Kate


#SolarPower #HarnessTheSun #SolarPanels #CampervanSolar #MotorhomeSolar #LiveGreen #GoGreen #LoveThePlanet #FamilyVanLife #VanJourney #OffGridLiving


Comments